Frequently Asked Questions
Send Faxes Using Nextiva vFAX
Nextiva offers virtual fax service at an affordable price. Now you can send faxes via the vFAX Portal, an email address of your choosing, or even a traditional fax machine with the purchase of the Nextiva Fax Bridge device.
To send faxes via email:
Log in to the email account you set as the primary email address for your vFAX account. Only one email address is setup as the primary email for each vFAX line. If you're not sure which email to use, feel free to log in HERE and select Fax Settings or Update Profile from the Dashboard. Once you are in the primary email, navigate to compose a new email. When composing the email, enter the fax number @nextivafax.com in the TO field (I.e. 1xxxxxxxxxx@nextivafax.com). Attach the documents you would like to fax in the order the recipient should receive them. You can attach up to 10 files. NOTE: The maximum file size for a fax is 5MB, and faxes larger than 2MB will experience extended send times. Your email provider may also limit the file size you can send. Below is a list of accepted files:
Image Files (TIFF, GIF, PNG, JPEG) Adobe Acrobat Files (PDF) Microsoft Office Files (DOC, XLS, PPT) Printer File Formats (PCL, EPS, PS) Internet Files (HTML, XML, XSL) Text Files (TXT, RTF) Once your documents are attached, you can type a message into the subject and body of the email if you wish. If you are using our default cover page, the subject will appear on the Fax Subject and any text in the body of the email will be displayed under Notes on the cover page. When you're done you are ready to send the email (Figure 1-1). NOTE: There is a maximum amount of 2,000 characters on the Notes section of the cover page.
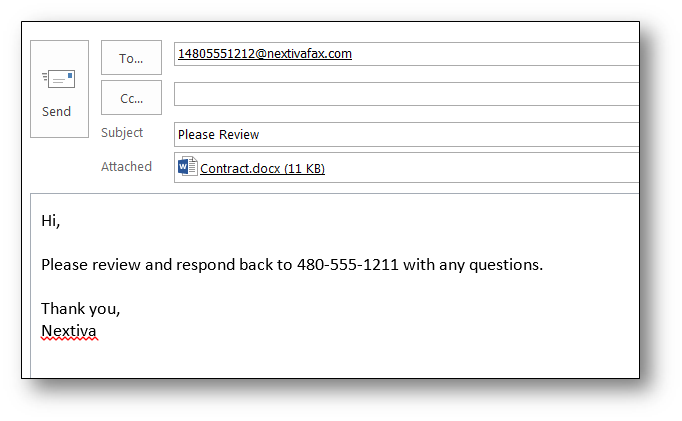
Figure 1-1: vFAX via Email
Sending your fax is now complete. You can track the progress of your fax by logging into the vFAX portal and select Search at the top to view all faxes or you can refer to the email notifications, if enabled. Faxes tend to take 1 to 3 minutes per page on average.
To send faxes with the Nextiva vFAX Portal:
Log in to the vFAX Portal HERE and enter your login credentials (Figure 2-1). Answer the security question, and select Submit.
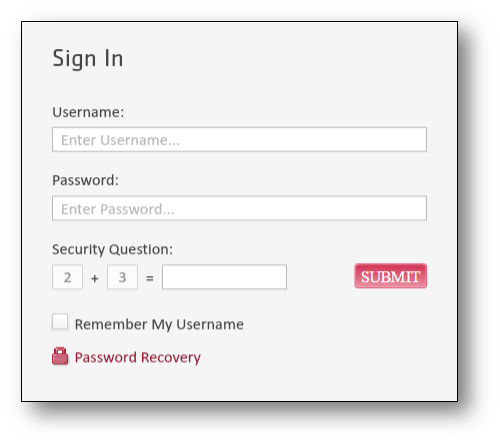
Figure 2-1: vFAX portal
Next, select Send from the menu at the top of the vFAX Portal, or Send A Fax from the Dashboard, whichever you prefer (Figure 2-2).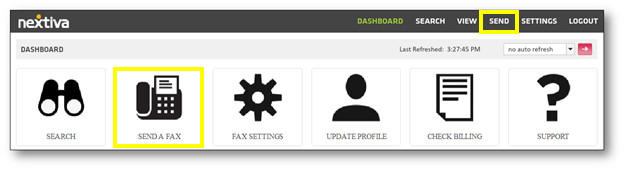
Figure 2-2: vFAX Dashboard
Enter the required information in the following fields: Fax Number (destination number), Deliver To (name of the recipient), Sent From (sender’s name), Fax Subject, and Notes. You also have the option to include or remove the Cover Page, and Schedule faxes to be sent on a specific date as well. The only field that is required is the Fax Number (Figure 2-3). NOTE: If you would like to include your own cover page, remove our default cover page and attach your own cover page before attaching all other documents.
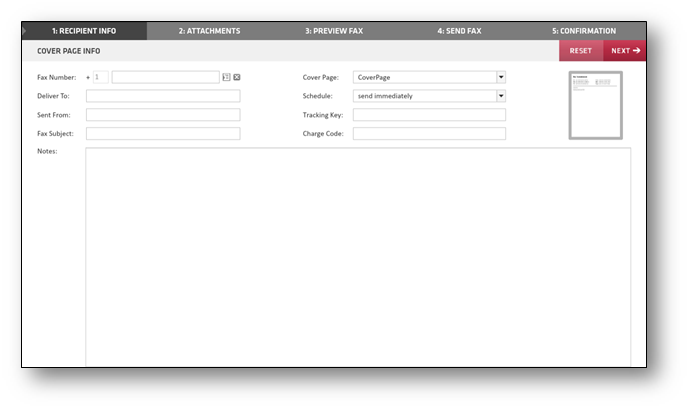
Figure 2-3: Recipient Info
Once you have filled out all the required information you'd like to use, select Next in the upper right corner. Here you have the option to upload a file (up to 10 files total per fax/5MB max). The accepted file formats are listed on the right hand side for easy reference. Find the file(s) on your computer that you want to send by selecting Browse. The file(s) you selected will display under Selected Files once they have been successfully attached. Files will send in
the order you add them (Figure 2-4).
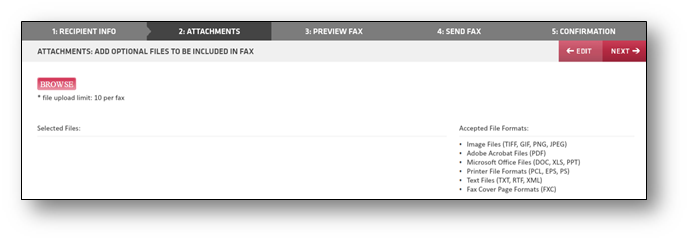
Figure 2-4: Attachments
Click Next once all of your files are attached. NOTE: At any time you can select the Edit button to the left of Next. This will take you back to the previous step.
You should now see the Preview Fax screen (Figure 2-5). You will notice the preview fields are showing coding, this screen is just to show you where the info feeds from, including the info from the Recipient Info tab. Click Next.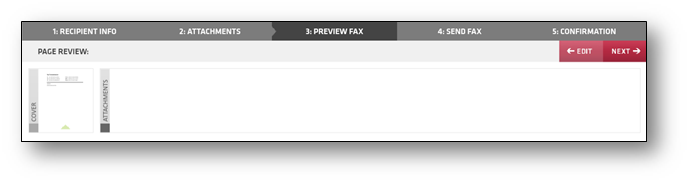
Figure 2-5: Preview Fax
The next screen accomplishes two tasks. First, it gives you the option to select the Type of fax (personal, business, etc.) and a destination Folder. This is used for organizational purposes, if you would like additional information on how create a new filter, click HERE. Also, you may add a memo for yourself to reference down the road. This screen also allows you to add five additional fax numbers or email addresses, so you can send up to 6 recipients at a time
(Figure 2-6). Once complete, select Send.
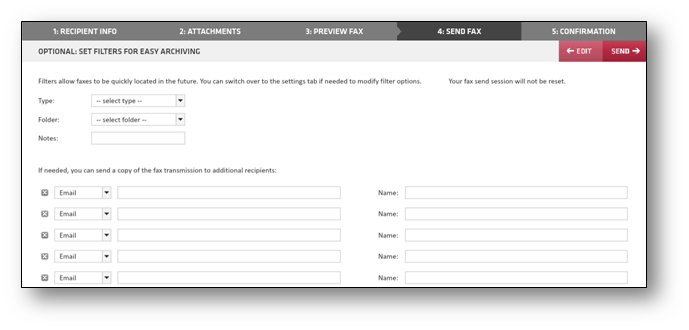
Figure 2-6: Send Fax
Sending your fax is now complete. You can track the progress of your fax by selecting Search at the top of the portal to view all faxes or you can refer to the email notifications if enabled. Faxes tend to take 1 to 3 minutes per page on average.
To send faxes via email:
Log in to the email account you set as the primary email address for your vFAX account. Only one email address is setup as the primary email for each vFAX line. If you're not sure which email to use, feel free to log in HERE and select Fax Settings or Update Profile from the Dashboard. Once you are in the primary email, navigate to compose a new email. When composing the email, enter the fax number @nextivafax.com in the TO field (I.e. 1xxxxxxxxxx@nextivafax.com). Attach the documents you would like to fax in the order the recipient should receive them. You can attach up to 10 files. NOTE: The maximum file size for a fax is 5MB, and faxes larger than 2MB will experience extended send times. Your email provider may also limit the file size you can send. Below is a list of accepted files:
Image Files (TIFF, GIF, PNG, JPEG) Adobe Acrobat Files (PDF) Microsoft Office Files (DOC, XLS, PPT) Printer File Formats (PCL, EPS, PS) Internet Files (HTML, XML, XSL) Text Files (TXT, RTF) Once your documents are attached, you can type a message into the subject and body of the email if you wish. If you are using our default cover page, the subject will appear on the Fax Subject and any text in the body of the email will be displayed under Notes on the cover page. When you're done you are ready to send the email (Figure 1-1). NOTE: There is a maximum amount of 2,000 characters on the Notes section of the cover page.
Figure 1-1: vFAX via Email
Sending your fax is now complete. You can track the progress of your fax by logging into the vFAX portal and select Search at the top to view all faxes or you can refer to the email notifications, if enabled. Faxes tend to take 1 to 3 minutes per page on average.
To send faxes with the Nextiva vFAX Portal:
Log in to the vFAX Portal HERE and enter your login credentials (Figure 2-1). Answer the security question, and select Submit.
Figure 2-1: vFAX portal
Next, select Send from the menu at the top of the vFAX Portal, or Send A Fax from the Dashboard, whichever you prefer (Figure 2-2).
Figure 2-2: vFAX Dashboard
Enter the required information in the following fields: Fax Number (destination number), Deliver To (name of the recipient), Sent From (sender’s name), Fax Subject, and Notes. You also have the option to include or remove the Cover Page, and Schedule faxes to be sent on a specific date as well. The only field that is required is the Fax Number (Figure 2-3). NOTE: If you would like to include your own cover page, remove our default cover page and attach your own cover page before attaching all other documents.
Figure 2-3: Recipient Info
Once you have filled out all the required information you'd like to use, select Next in the upper right corner. Here you have the option to upload a file (up to 10 files total per fax/5MB max). The accepted file formats are listed on the right hand side for easy reference. Find the file(s) on your computer that you want to send by selecting Browse. The file(s) you selected will display under Selected Files once they have been successfully attached. Files will send in
the order you add them (Figure 2-4).
Figure 2-4: Attachments
Click Next once all of your files are attached. NOTE: At any time you can select the Edit button to the left of Next. This will take you back to the previous step.
You should now see the Preview Fax screen (Figure 2-5). You will notice the preview fields are showing coding, this screen is just to show you where the info feeds from, including the info from the Recipient Info tab. Click Next.
Figure 2-5: Preview Fax
The next screen accomplishes two tasks. First, it gives you the option to select the Type of fax (personal, business, etc.) and a destination Folder. This is used for organizational purposes, if you would like additional information on how create a new filter, click HERE. Also, you may add a memo for yourself to reference down the road. This screen also allows you to add five additional fax numbers or email addresses, so you can send up to 6 recipients at a time
(Figure 2-6). Once complete, select Send.
Figure 2-6: Send Fax
Sending your fax is now complete. You can track the progress of your fax by selecting Search at the top of the portal to view all faxes or you can refer to the email notifications if enabled. Faxes tend to take 1 to 3 minutes per page on average.
Last updated 01/02/2018 11:33 am
Please Wait!
Please wait... it will take a second!